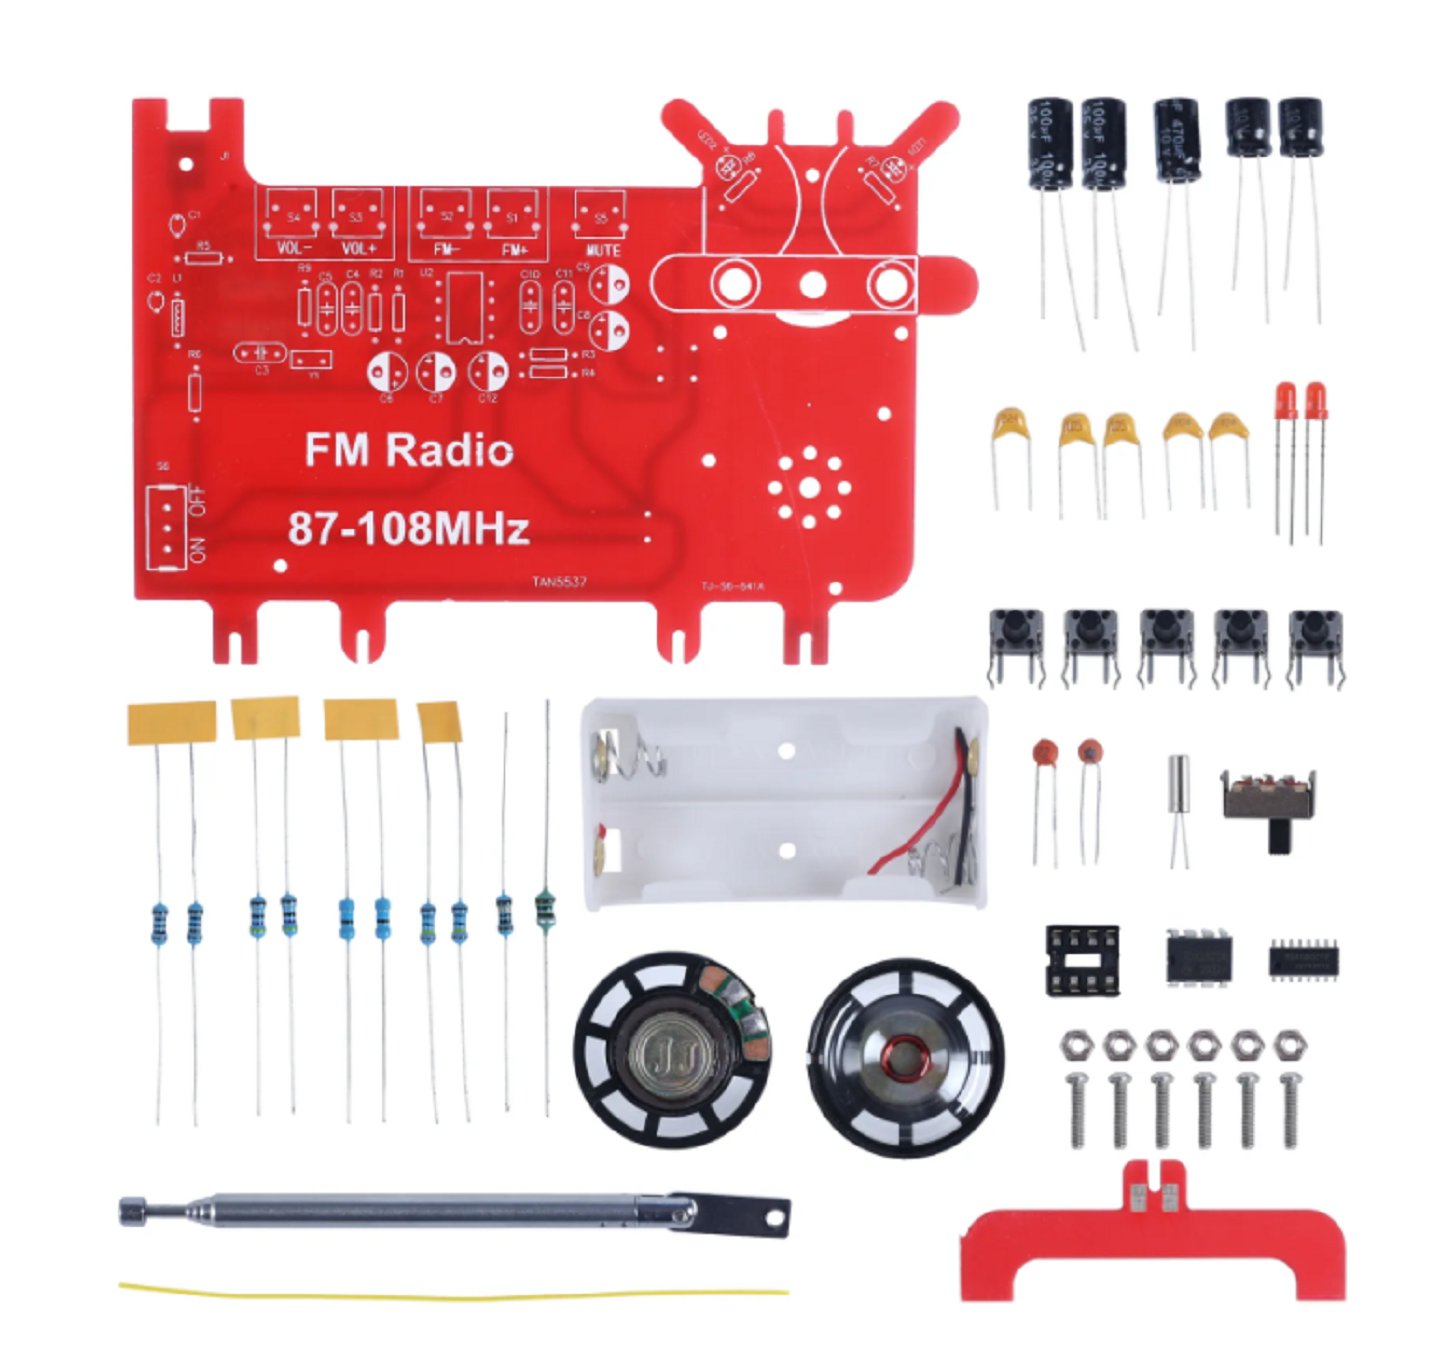
HS5331 DIY FM Radio Electronic Soldering Kit Dual Channel Receiver With Charging 87MHz-108MHz RDA5807 DC 3.0V for Students/Beginners
1.Introduction:
It is a 3.0V RDA5807 87MHz-108MHz FM Radio Receiver DIY Kit.It is a simple FM receiver and can be used all over the world with power by AA*2 battery. It is very suitable for users to learn electronic circuits, practice and proficient soldering skills, and enhance electronic professional knowledge and interest.
2.Feature:
1>.Universal frequency 87MHz-108MHz
2>.Perfect simple circuit
3>.DIY hand soldering
4>.Stable fixing bracket
5>.Support battery charging function
3.Parameter:
1>.Product Name:RDA5807 FM Radio Receiver DIY Kit
2>.Work Voltage:DC 3.0V
3>.Power Type:AA*2 Battery(Not Included!)
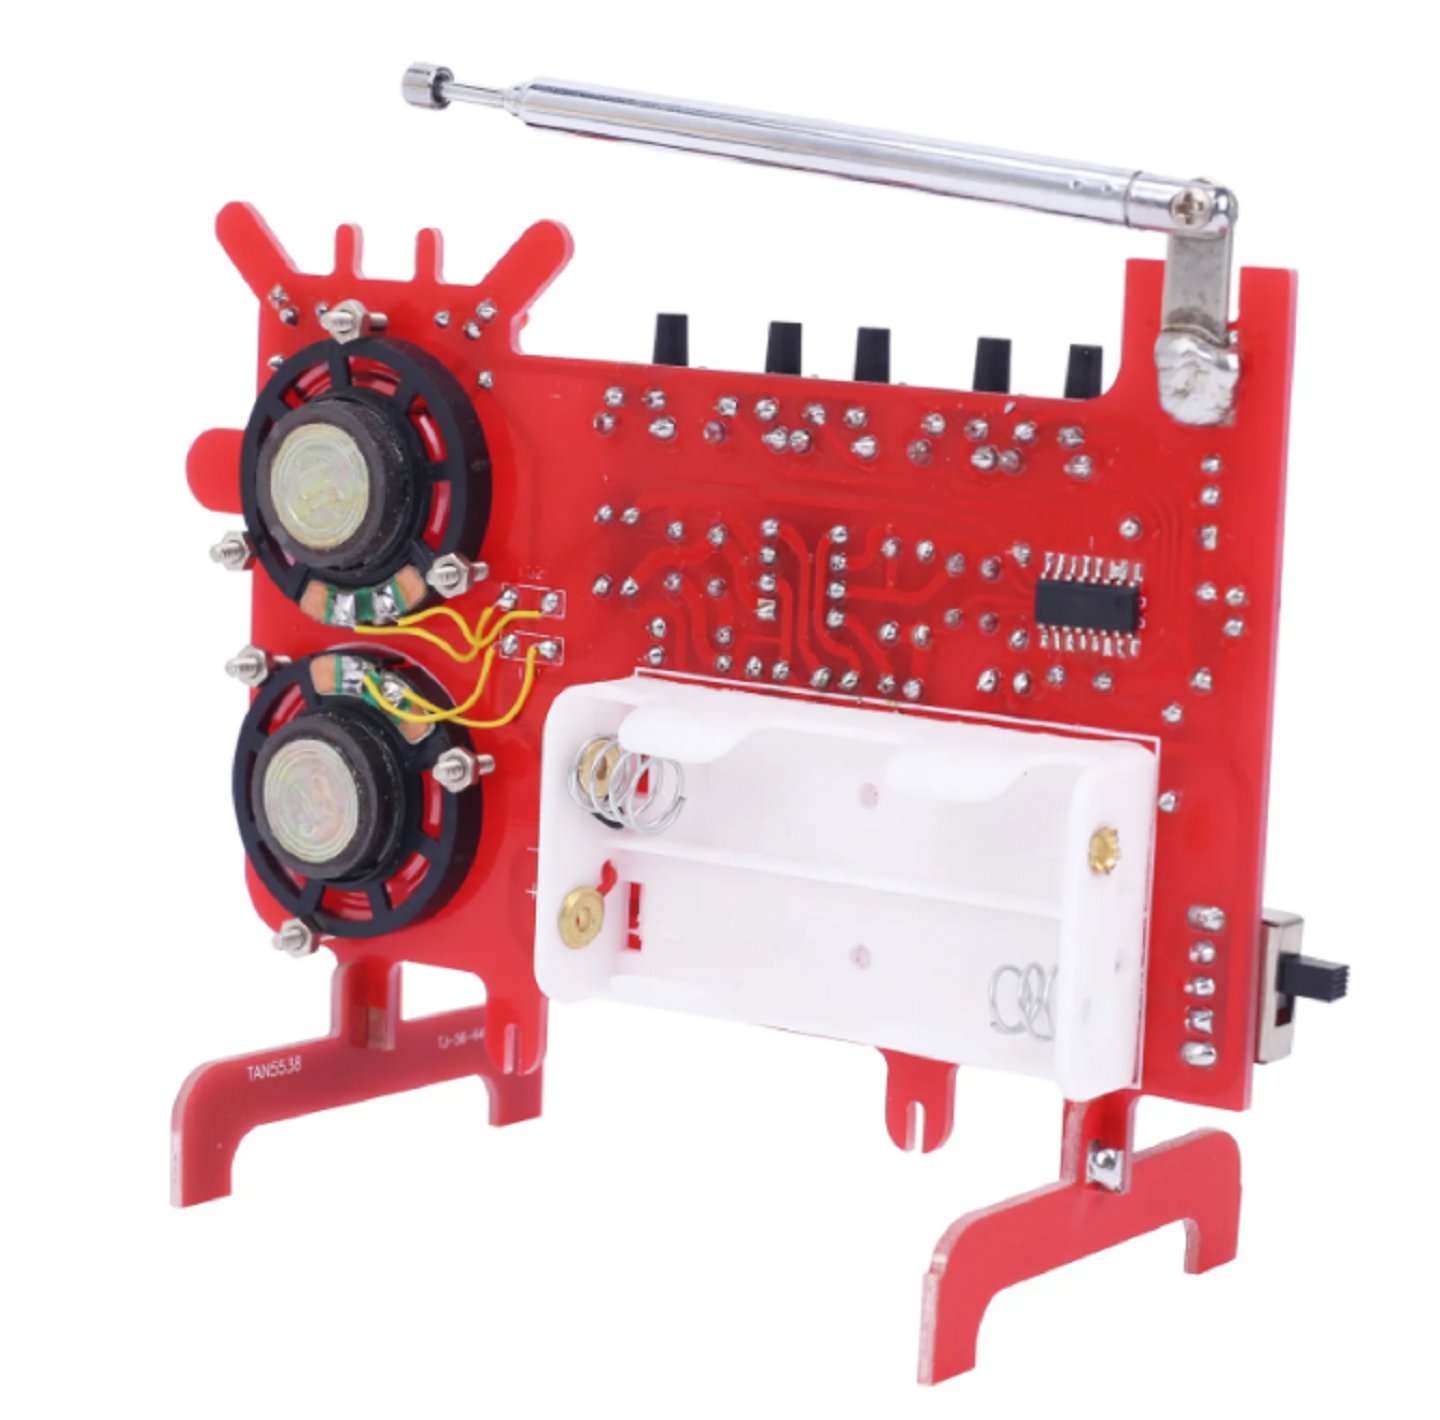
4>.Channel: Dual channel
5>.FM Frequency:87MHz-108MHz
6>.Frequency accuracy:0.1MHz
7>.Equivalent noise:>=30dB
8>.Work Temperature:-25℃~85℃
9>.Work Humidity:5%~95%RH
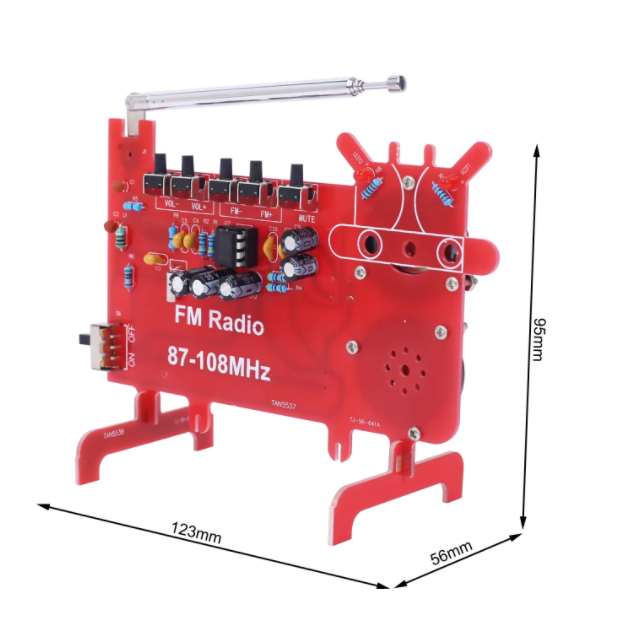
10>.Size(Installed):123*95*56mm
4.Function:
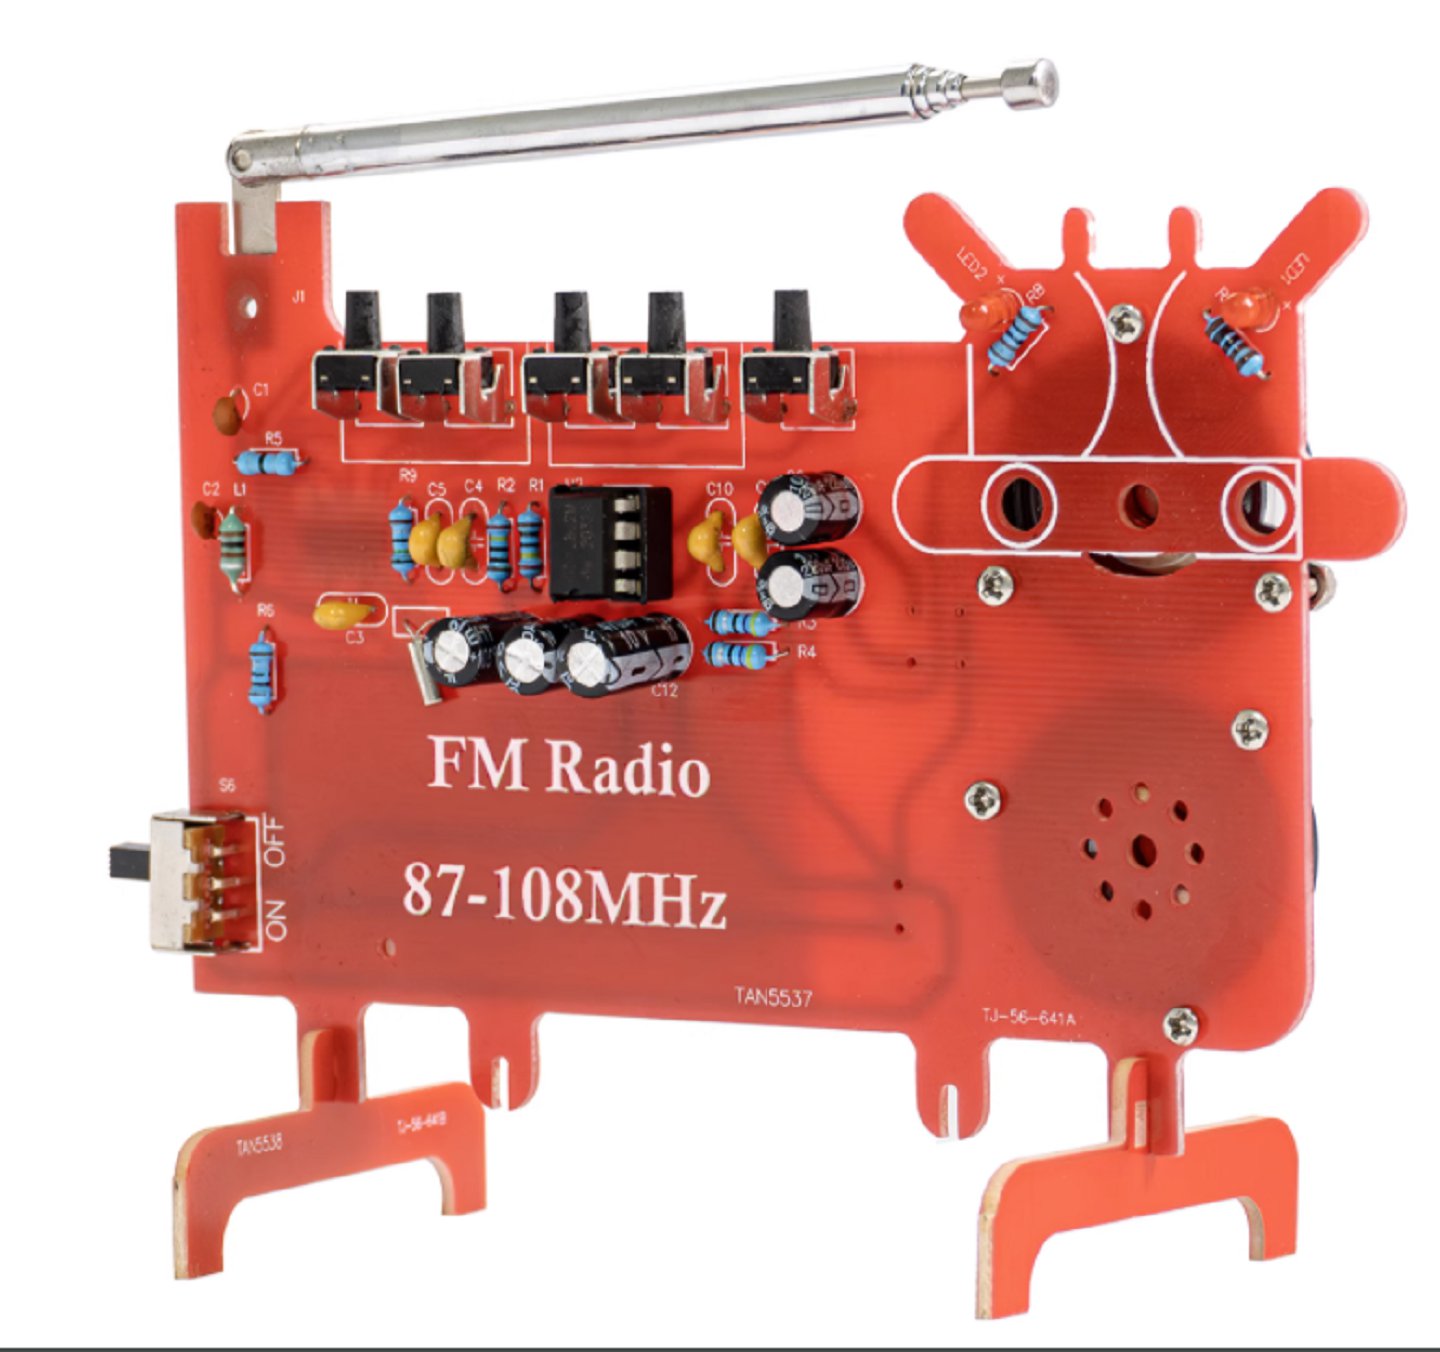
1>.Buttons VOL- and VOL+ are used to adjust volume.
2>.Buttons FM- and FM+ are used to switch FM stations.
3>.The toggle switch on the side is the power switch.
5.Application:
1>.Training solderingskills
2>.Student school
3>.DIY production
4>.Project Design
5>.Electronic competition
6>.Gift giving
7>.Crafts collection
8>.Home decoration
9>.Souvenir collection
10>.Graduation design
11>.Holiday gifts
6.Installation Tips:
1>.User needs to prepare the solderingtool at first:
1.1>.Small screwdriver
1.2>.Small wire cutters
1.3>.Fine tip soldering iron(Recommend using a fine point soldering tip)
1.4>.Good quality small gauge solder(recommend no larger than 1.0 mm)
1.5>.Magnifying glass
2>.Please be patient until the installation is complete.
3>.The package is DIY kit.It need finish install by user.
4>.The soldering iron can't touch the components for a long time(1.0 second), otherwise it will damage the components.
5>.It is recommend building the project starting with the lowest components first and working up to the highest components. This is a common practice as it makes it easier to hold the low components on the board while soldering
6>.Pay attention to the positive and negative of the components.
7>.Strictly prohibit short circuit.
8>.User must install the LED according to the specified rules.Otherwise some LED will not light.
9>.Install complex components preferentially.
10>.Make sure all components are in right direction and right place.
11>.Check that all of the LED can be illuminated.
12>.It is strongly recommended to read the installation manual before installation!!!
13>.Please wear anti-static gloves or anti-static wristbands when installing electronic components.
 Limited")


